Every cyclist wants a smooth ride. Several factors go into that – proper riding technique, high-quality gear, and a good set of brakes.
Bicycle brakes tend to wear down and become less effective over time. As that happens you need to adjust the firmness of your bike brakes to keep them functioning properly.
Many bike commuters take them to a bicycle shop for periodic adjustments. But why bother wasting your money when you can adjust your bike brakes yourself?
In most cases the process is relatively easy – read on to see how!
Importance of Adjusting Bike Brakes

Source: Flikr
Checking your bike brakes regularly not only helps them to function better but also guarantees a safe ride. The brake pads and brake cables are the two most essential components of your bike’s braking system. To adjust the brakes on your bicycle, these are the only two components that you will be focusing on.
Some common problems that you might face if your brakes are not adjusted properly are as follows:
- Brake pads that have been worn out or are not in the perfect position with the rim might pose a safety threat.
- When brake cables are excessively loose, stopping the bike becomes tedious.
- This is also bad for the gear shaft as it is prone to excessive wear and tear due to prolonged movement without proper braking.
Adjusting Brake Pads: Here’s How You Can Do It
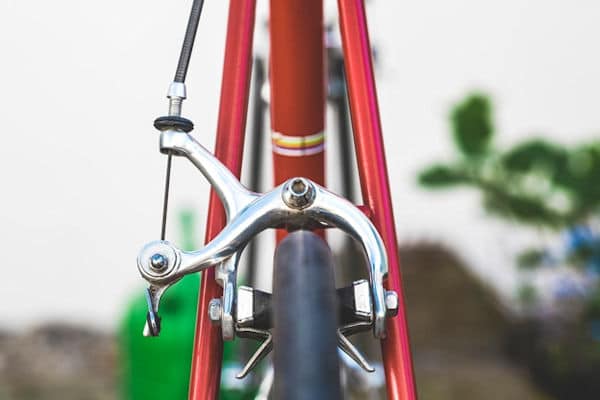
Brake pads need to be in line with the braking surface on the rim to function correctly. If positioned too high, pads may come in contact with the tire and cause a hole to form. If they are set too low, they might create a lip that could keep the brake pad against the rim and cause the pad to jam.
Ensuring if Brake Pads Are in Good Condition
Before starting the adjustments, it is essential to inspect your brake pads visually. Brake pads are cylindrical pads that clamp down the front tire of your motorcycle. They restrain the rolling motion whenever you press a lever present on the handle.
Make sure to check and see whether the brake pads have worn down below the “wear line.” If they have, you might have to buy new ones. Otherwise, you can fix them by adjusting their position.
To replace your old brake pads with new ones, you can effortlessly search for the same online. Another option for purchasing new ones would be from any local bike repair shop near you.
Here are some recommendations you might want to try.
Steps to Follow
Checking the Exact Position Where the Pads Hit the Rim.
As stated previously, the brake pad’s proper position is ideally in line with the rim. You will have to go through the following steps to make the necessary adjustments:
1. Undoing the Bolt on the Pad.
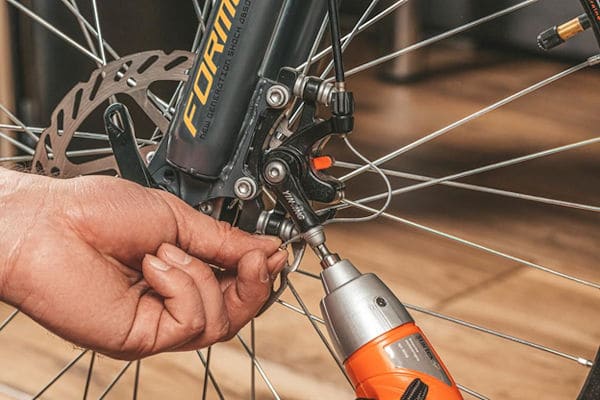
To loosen the bolts, you will need to spin an Allen wrench in counter-clockwise rotation. While doing so, take care not to loosen them all the way outwards, as this could cause the brake pads to pop out of their slots. Anywhere between 4-7 rotations should be acceptable.
2. Aligning the Brake Pads.

Source: Rawpixel
Once you have loosened the bolts, you can easily fine-tune the position of your brakes on your wheel. If the pads are already too loose, narrow the space between the pads and the rim by pressing them closer together.
You might need to move them somewhat farther away from the rim than you had them previously if they were too close together.
The best location for your brake pads is a few millimeters away from the rim. As the space between the brake pads and the rim decreases, your brakes will be more sensitive when applying the brakes with the lever.
3. Re-Tightening Bolts of the Brake Pad.
Using the Allen key, tighten up your bolts once you are satisfied with the positioning of your pads. Make sure you don’t pull the brakes out of the alignment while tightening your brakes. A highly stiff adjustment may cause you to feel a jerk when breaking. Hence, keep the tightness a tad bit below the maximum.
Things to Keep in Mind
- Double-check that the pads aren’t contacting the rim before pulling on the release lever.
- Always keep the amount of torque you’ve applied on the bolt balanced on either side; this will guarantee that each brake pad is as sensitive as the other, allowing them to function in the same manner, all at the same time.
Adjusting the Brake Cable
If you notice that you have to exert significant force on the brake lever to slow down, or if the lever squeezes directly into the handlebar, your brake cable probably has to be adjusted.
Tightening and Loosening the Barrel
You need two finger lengths between the handlebar and the brake to make it function properly.
Steps to Follow
After determining whether the brake cable is too tight or too loose, you can easily make tiny changes with the barrel adjuster to correct the situation with the following steps:
Loosening the Barrel
By rotating the caliper anticlockwise with your Allen key, you can easily loosen up the cable from the caliper. Be careful not to unbolt it entirely, or you’ll find yourself needing to replace the brake.
After loosening the Barrel, if you think that there’s still some space left between the handlebar and the brake, then you need to move on to the next step.
Loosening the Bolt For Re-Adjustment
For readjusting, you’ll have to loosen the bolt that holds the brake cable to the caliper. The brake cable is the long, thin cable that comes out of the caliper and stops the vehicle from moving forward. If we talk about the caliper, it’s the central part of the brake where the brake pads connect.
Try finding the bolt that holds the brake cable in place and use an Allen wrench to turn it back and forth 2-3 times until the bolt gets a little loose.
Retightening the Caliper Bolt to its Original Position
To ensure the cable is securely fastened in place, spin the screw clockwise 2-3 times using the allen wrench.
Tightening the Barrel Adjusters
Following the completion of the bolt adjustment, start rotating the barrel adjusters in a clockwise manner until they are tightened perfectly.
Things to Keep in Mind
- To test whether the issue has been resolved once you have loosened the barrel adjustment, lift the brake lever. It is necessary to adjust the brake cable on the caliper if the brake cable is still too loose.
- Don’t take the bolt completely out of the socket. To loosen the bolt, crank the Allen wrench counterclockwise a few times until it comes free.
- Keep checking the brake cables and repeat the process if not satisfied.
Conclusion
Adjusting bike brakes is not as difficult as it sounds to be. If you still think that you might not be able to perform the steps mentioned above on your own, then try seeking some professional help or take your bicycle to the repair shop.
Make sure you conduct regular checks on your bike brakes and other elements like handle, seat, and tires. We hope this guide helped you know the easiest way to adjust your bike brakes. Thanks for reading!


